Configure Channels
Email Channels are configured through Buzzeasy's Portal.
For Exchange/O365 channels, an your IT administrators must register the application with Microsoft Entra ID (formerly known as Azure Active Directory). This is not needed for IMAP channels.
Create an email channel
Provided you are an Administrator or have access to the Email business entity, select Email > Channels from the portal menu.
Click Create to launch the email channel creation process.
Enter a Name for the channel.
Select an optional Business unit.
Select an existing Workflow for the channel. If you do not select an existing workflow, you will need to provide details for a new one as part of the process.
Optionally set the Create channel in enabled state toggle to start up the channel as soon as it is saved and ready. Otherwise Buzzeasy won't consider the channel available unless it is explicitly enabled.
You may bypass some config stages in the new email channel creation process the following chapters detail by skipping optional tabs. Would you wish to do so, just click Next enough times until you reach the final tab and then click Create.
A successfully created email channel will show a green checkmark indicating a proper connection to the mail server.
Workflow details
In case you create a new workflow for the new channel, the channel creation process asks you to provide the following details in the Workflow Details tab:
Specify the new Workflow name.
Set the Idle timeout.
Email configuration
During initial setup, specify the Account type for the email server Buzzeasy needs to connect to. Once created, you can not modify the account type of the channel. You need to delete the channel and create a new one for the desired account type.
You can modify some account properties post creation, like the email address of an Exchange account, or the various IMAP settings.
Exchange email account type
- For Exchange (O365) mail servers, the only property you need to set is the User email address where the channel emails are managed.
IMAP email account type
For the IMAP email servers, fill out the following mandatory fields:
IMAP host (e.g.,
imap.gmail.com)SMTP host (e.g.,
smtp.gmail.com)Username and password for both IMAP and SMTP. Note that we don't offer the usage of separate IMAP/SMTP user accounts.
In case you'd use a non default email folder on the server, specify the optional Mail folder name as well.
Note
IMAP for Outlook (e.g., imap.outlook.com) is not currently supported.
Setting up an IMAP email channel with Gmail
In addition to the standard configuration above, you'll need to perform the followings as well at the Gmail portal:
Enable 2-Step Verification for the account.
Create an App Password for the account, which must be used as the password in the channel configuration above.
See the official Google documentation for details.
For other providers, refer to their documentation on how to allow third-party IMAP/SMTP access.
Create an email signature
An email signature on your channel can be used to standardize signatures of outbound emails to maintain corporate identity and branding policies. Use it to populate key agent properties specified in the Agents section of the portal, e.g. Name.
Discover how to edit an agent to make sure the key fields are properly set.
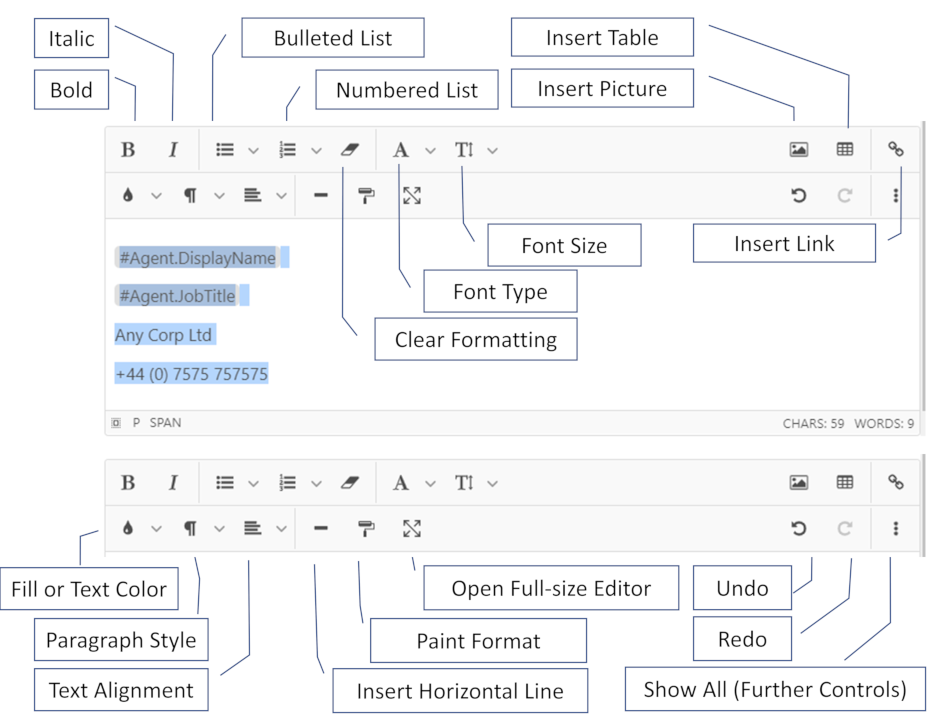
Enter and format signature text
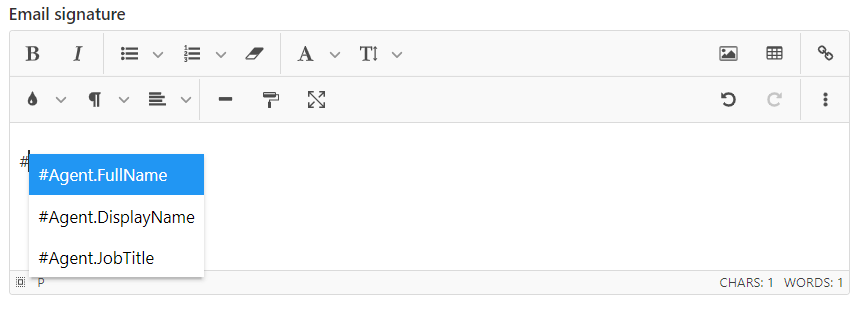
Insert a field placeholder into the email signature using the pound or hash character
#. The available fields: Name, Display Name, and Job Title appear as you type.Select the field you require.
Type generic text into the signature like a company name, department, website address, etc.
Select portions of the plain text then use the formatting tools to modify them in your signature.
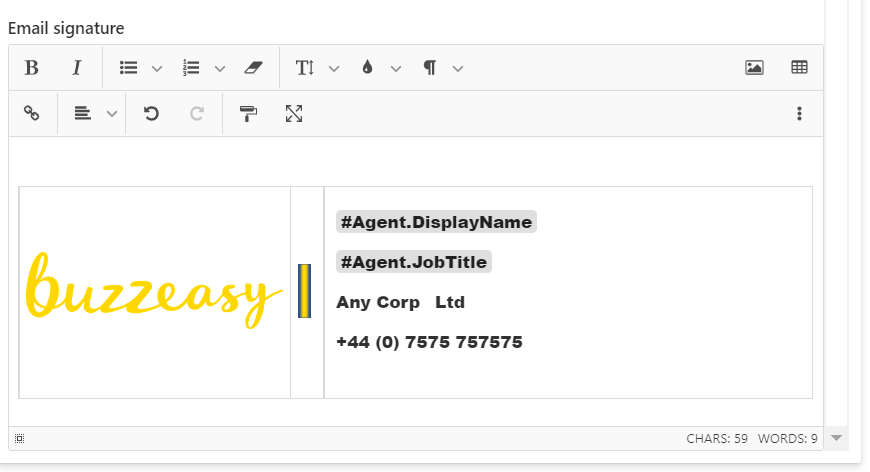
Align text and images
To align text and other objects, use tables. Insert text and images in separate cells and/or rows.
Set business hours
Configure your email channel's timezone, operational hours and holidays and to add exceptions. Your email workflow can use these settings to inform conversation routing.
Set completion codes
If required, designate completion codes for conversations flowing through this channel. Completion codes are used by agents when they close tasks and can also be defined in Agent Workspaces.
Draft Autosave
Buzzeasy automatically saves email drafts in the background while agents are composing them. This ensures that if an agent closes the tab or navigates away, they can return to the conversation without losing their work.
When the agent reopens the conversation, a notification appears:
The following draft was automatically saved for you.
The notification includes two options:
- Discard: Deletes the saved draft.
- Edit: Opens the draft for continued editing.
Supported file types
Due to security reasons, Buzzeasy supports a set number of file types.